Ads:
MeowMultiSound:
1- The General Menu

Since the software is in english it should be a little easier for you to understand than for the others. However, if something is missing or if you have a problem you can mail me at : meow at meow-prod dot com
This screen has several subsections:
2-The actions screen
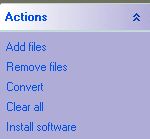
"Remove files": is an action that allows to remove one or
several files.
These files have to be selected in the list of files in order to remove
them. Use this action if you don't want convert a file, for example if
you made a mistake or if you have changed your mind.
"Convert"
starts the conversion from a format to an other, you must have files in
your file list in order to be able to use this option.
"Clear all" is an option that removes all your files in
your file list.
"Install software" is an action that allows to add a
shortcut on your
desktop to the current location of the software (usefull if you decide
to change the directory of the software). To remove this shortcut, just
erase it like any other file.
You can get some of these options if
you right click. (it just more handy)
3-The file list
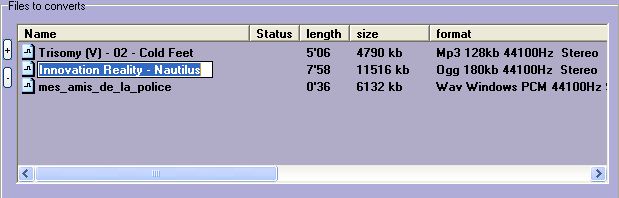
- the first removes audio files with a size of 0 sec.

The column "size", gives the length in Ko of the file (for information only).
However, note that if there is a problem in the two last columns, this is probably bad for the futher operations.
The "format" column, gives the audio format, the data rate of the sound file, the sample rate and if the file is mono or stereo.
There
is a last column that you can't see on the picture, that gives just the
full path of the file on your computer.
4- Before explaining the format window, let's see two buttons in the screen:

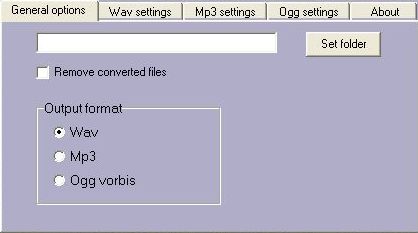
Here is an easy-to-understand menu:
-you can select the ouput directory (if you don't choose one, all files will be written to the root of your hard drive: c:\ usually if you are on windows XP, if not you'll get an access error).
- you have to select an output format (default is wav).
- the other pannels give the settings for each formats.
To make it easy, this is a summary:
If our default formats settings suit your purpose:
However, i would like to explain how to use a specific menu of the software:
6-The Mp3 pannel tag.
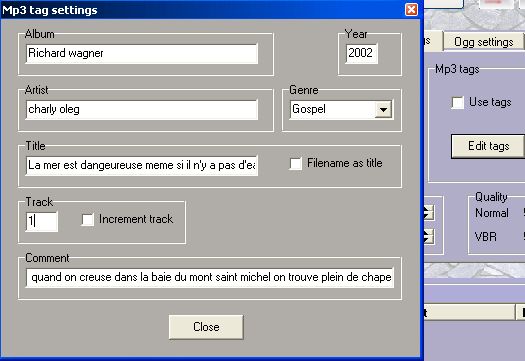
On this sub menu, you can set the Id3v1 tags of the mp3 files.
For Id3v2 tags you'll need to find an editor.
For what purpose is this editor useful for ?
Of course you could use it to convert one file just after an other and set each time the tags if you want.
This is just no very efficient, and it is probably better to use an other tag editor.
So why this editor ?
When you are converting files, the soft will assign tags to the file at the moment of it's creation. This setting can be useful if for example you're converting starting from the same album of the same artist (so same album, artist, year, style tag).
After that, you can off course set specific comments for each files, you should save time anyway.
Then you can (always to save time), set as title tag, the name of the file like it is in the title row in the file listing. (be careful this tag is limited in size).
You can increment the track number starting from the first number that is written (useful for tracks of a same album), you can check the box "increment track" to use this option.
Be sure that your files have a correct order in the file list.